Over the last couple of days I saw one question again and again: How to build an explosionbox?
Even though I am by far not the one, who came up with this wonderful idea, I nonetheless developed a passion for crafting these boxes of wonder. I can tell you one thing: it is so much fun. And that’s why I wanna show you in a step by step tutorial how to make an explosionbox.
Hier geht’s zur deutschen Version dieses Artikels
How to get started?
I highly recommend to start with deciding what you want to put into your explosionbox because that defines the measures.
Alas, I am already so busy with preparing for the Christmas market in December, so my boxes will contain these christmas ornaments. I intend to sell them together with the box at my market stall and inmy Etsy shop and I think this will be a bundle of joy.
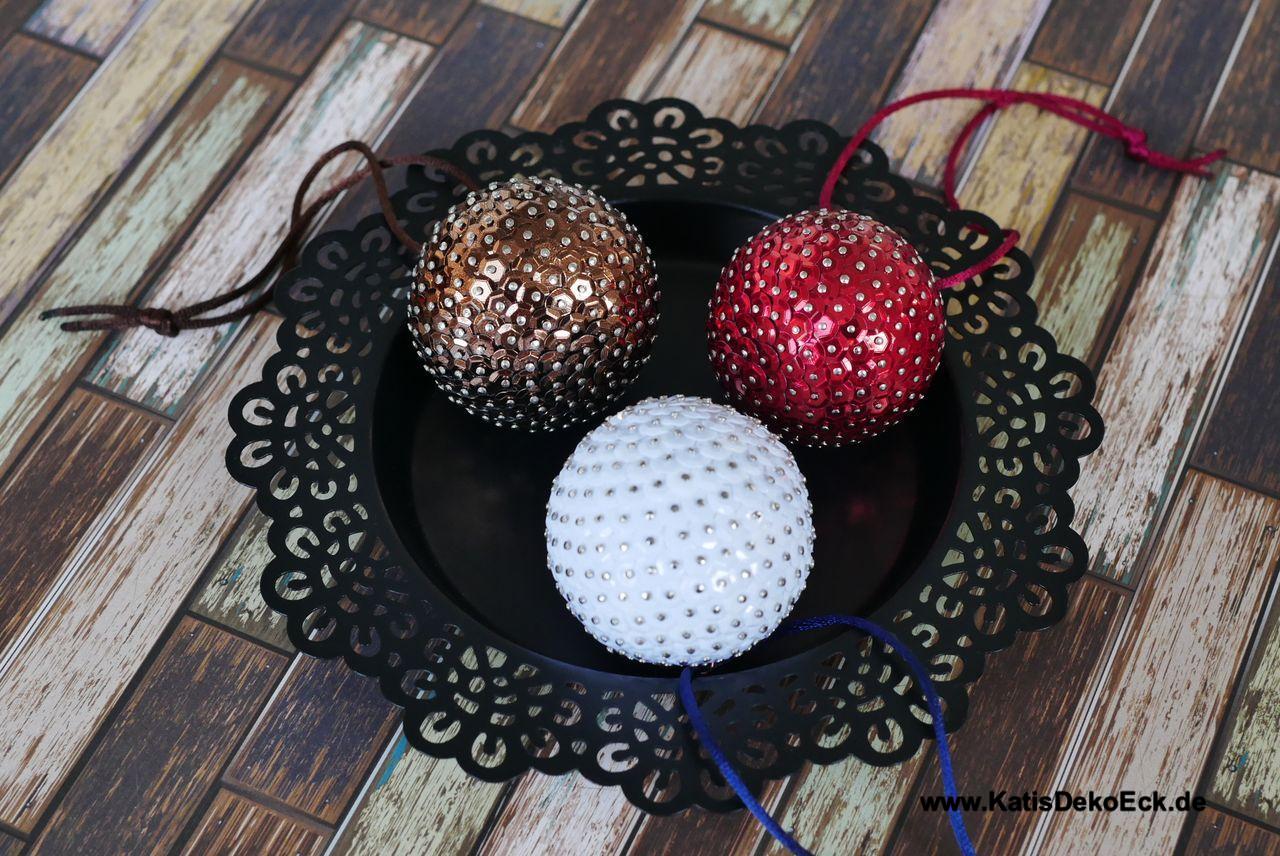
In case you are curious: you can find an article on how to create these ornaments using sequins here.
Ok, so what do I need for the creation of an explosionbox?
Actually not more than this:
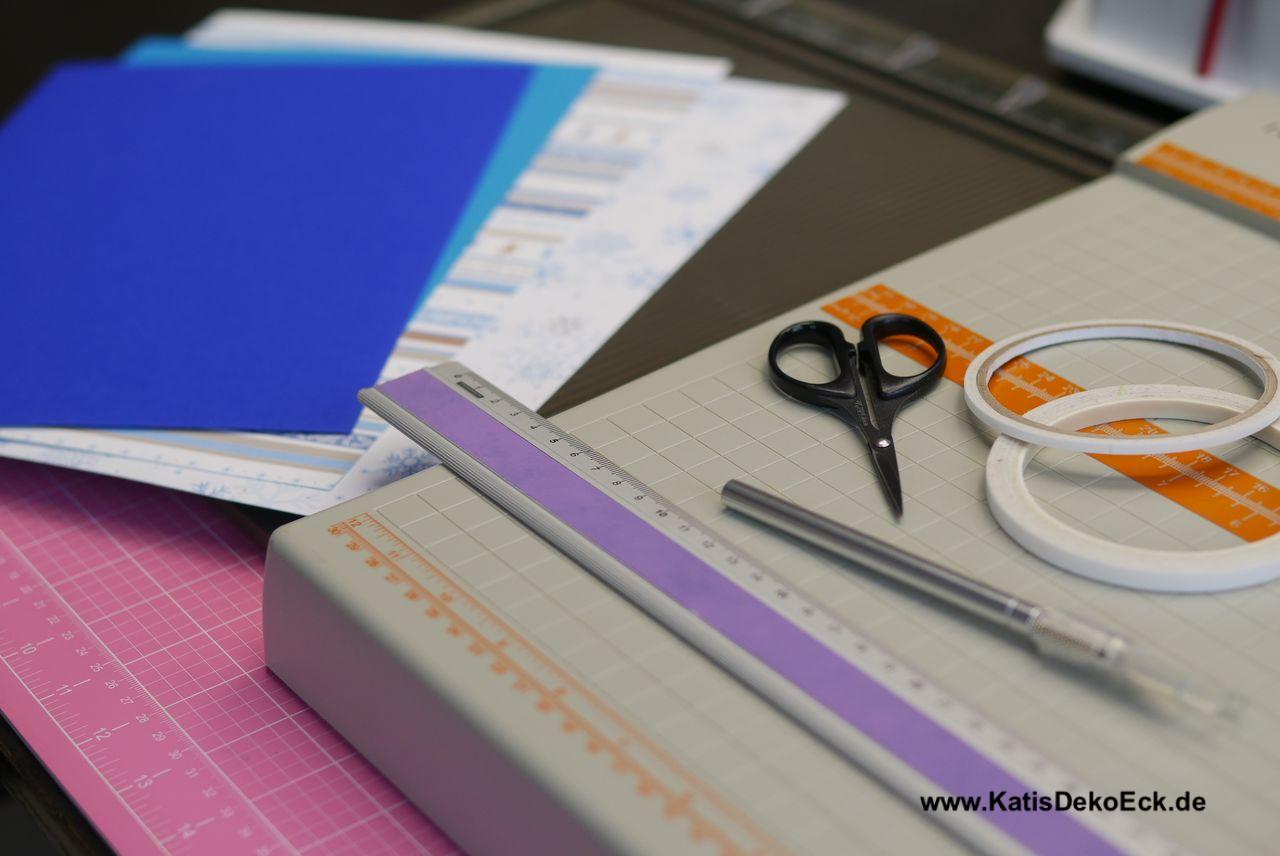
A paper cutting tool (this may even be a simple pair of scissors, if you like), ideally a scoring board (you can of course do without one, it might just be a bit more cumbersome…), scissors, the adhesive of your choice, a craft knife if you got one, a ruler and your papers.
What kind of paper do I need to create an explosionbox?
Here you can do whatever you like and every crafter developes their own preferences over time. I mostly (like almost everytime) use colored paste board in a 300g/qm weight. This can be bought in efficient packs of 50 pieces of Din A4 (8.5 x 11inches) size, but you can also buy single sheets of big sizes up to 50 x 70 cm.
The weight of your cardboard or pasteboard should be no less than 270g/sm, because you want your explosionbox to be as stable and durable as possible to make sure the receipient will have fun for quiet some time with it.
The boxes I intend to build today will be rather small, so for me A4 sized paper will be absolutely enough.
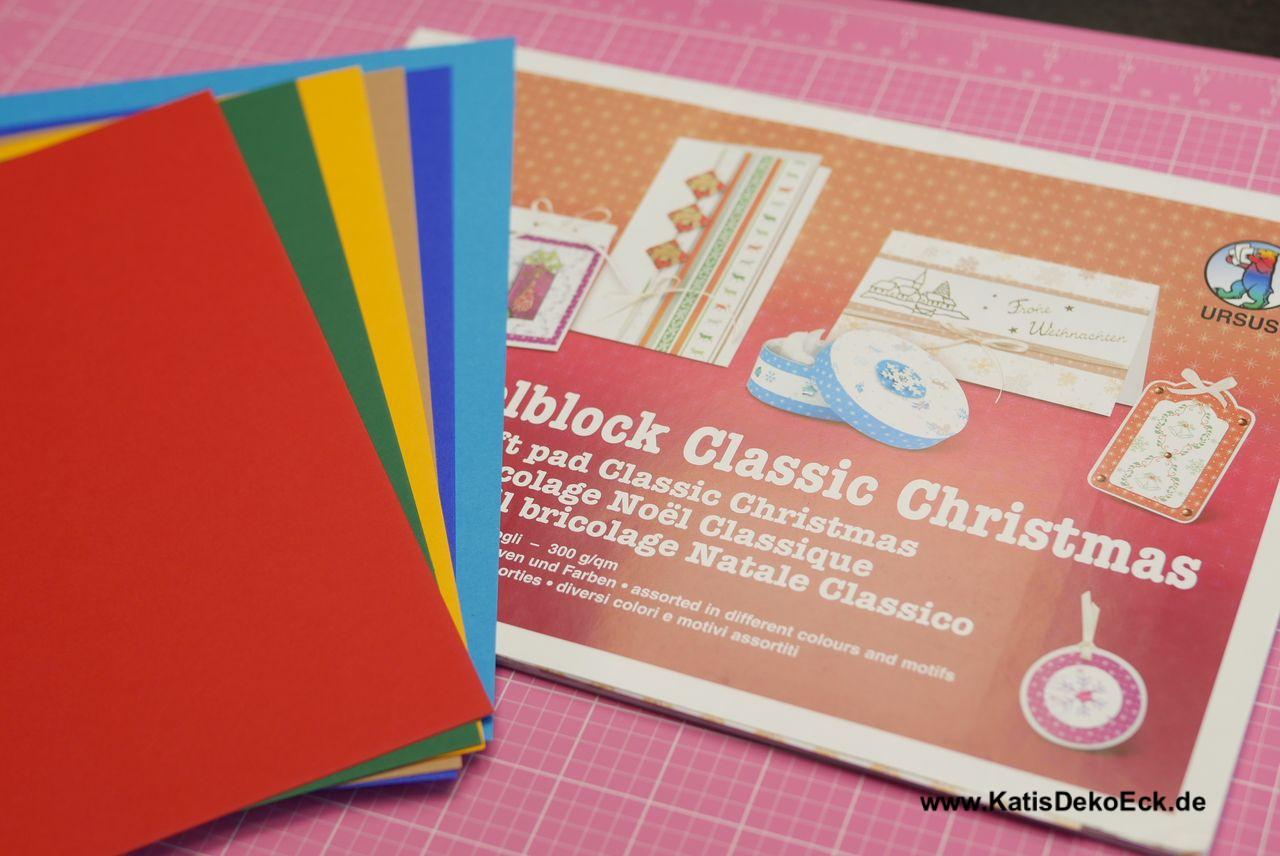
For the decoration of the outside of my boxes I chose a paper pad that I have used for quiet some time now and it is now due for using it up. Of course I won’t need a significant amount of this paper for just one box, but I don’t actually plan on stopping after one box…
Time to cut the long story short
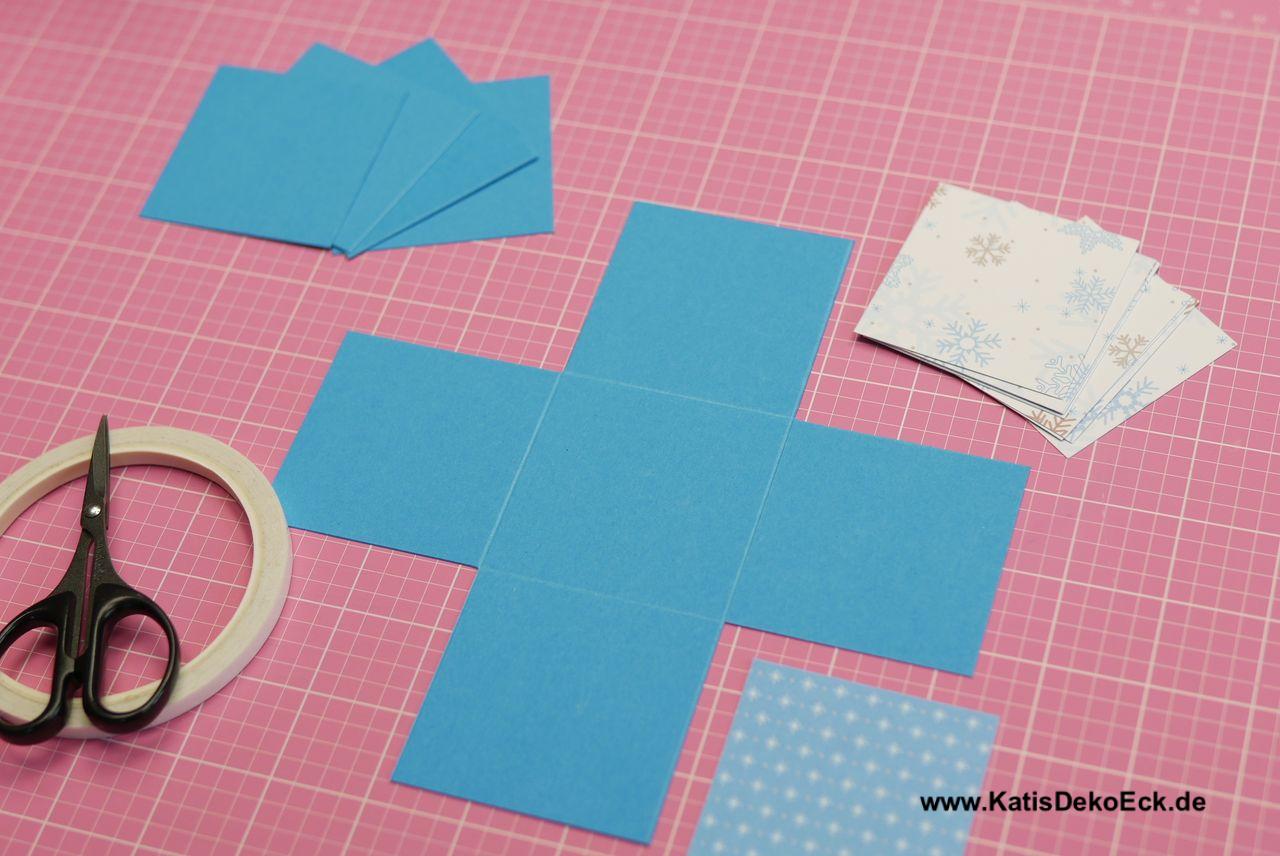
I want my boxes to have two layers and so I will start by cutting four squares. Two for the sides of my boxes, one for the lid and one for — I’m gonna show that in a bit. Stay curious…
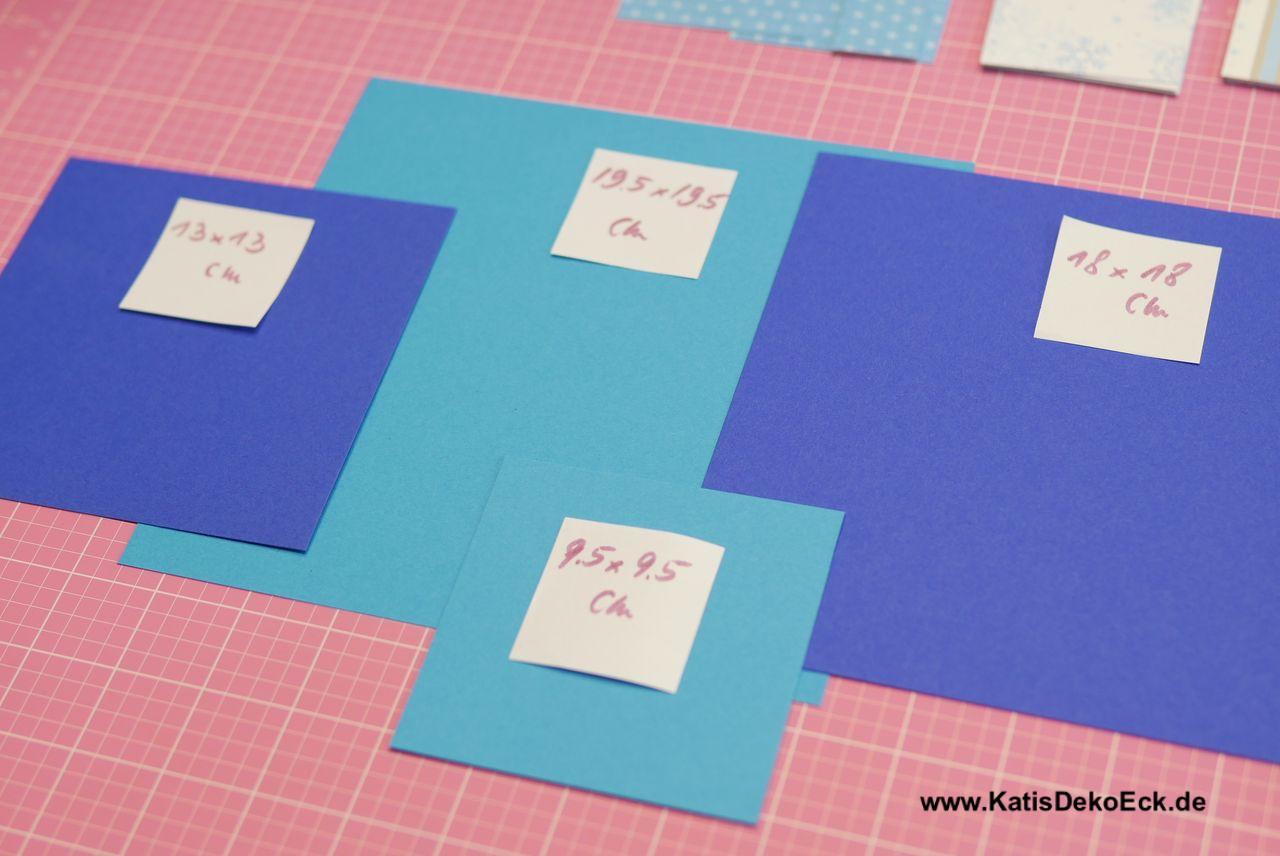
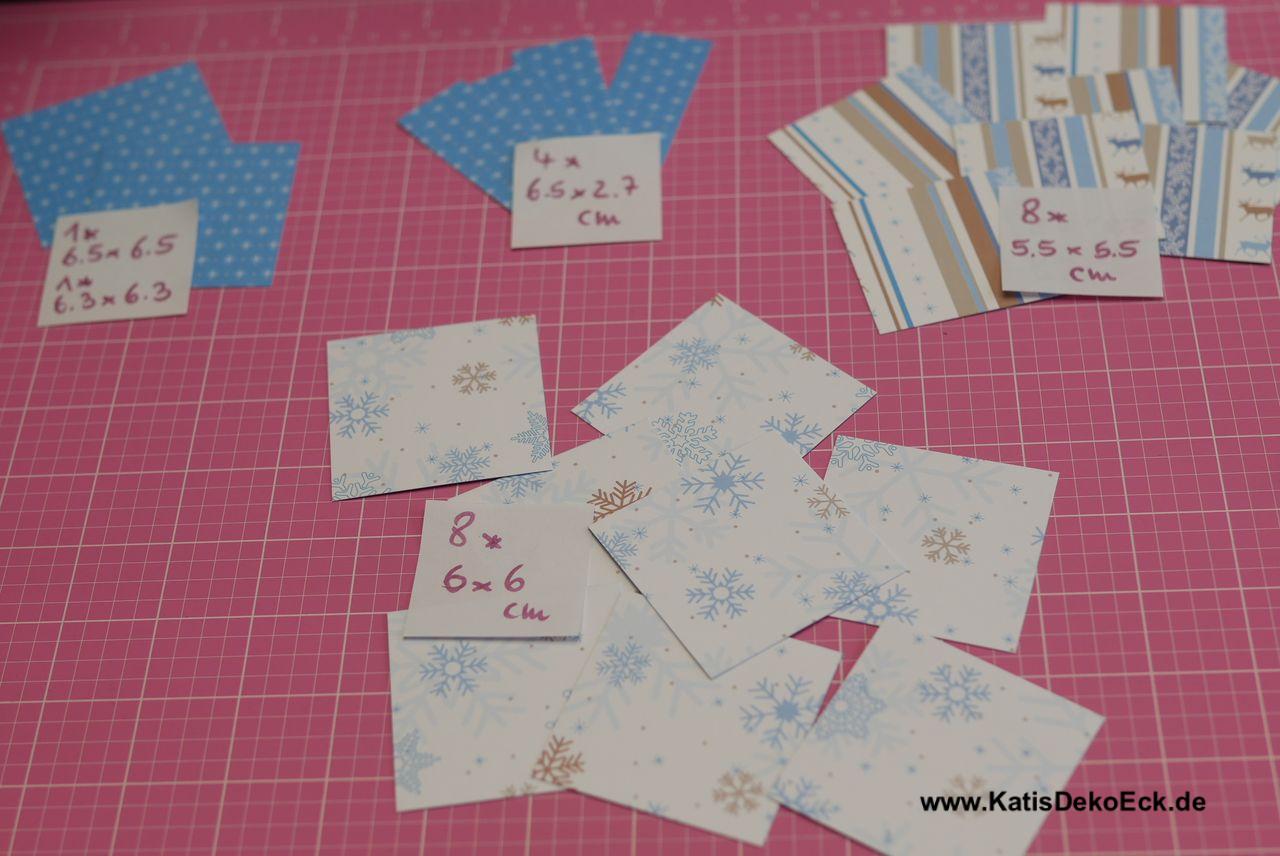
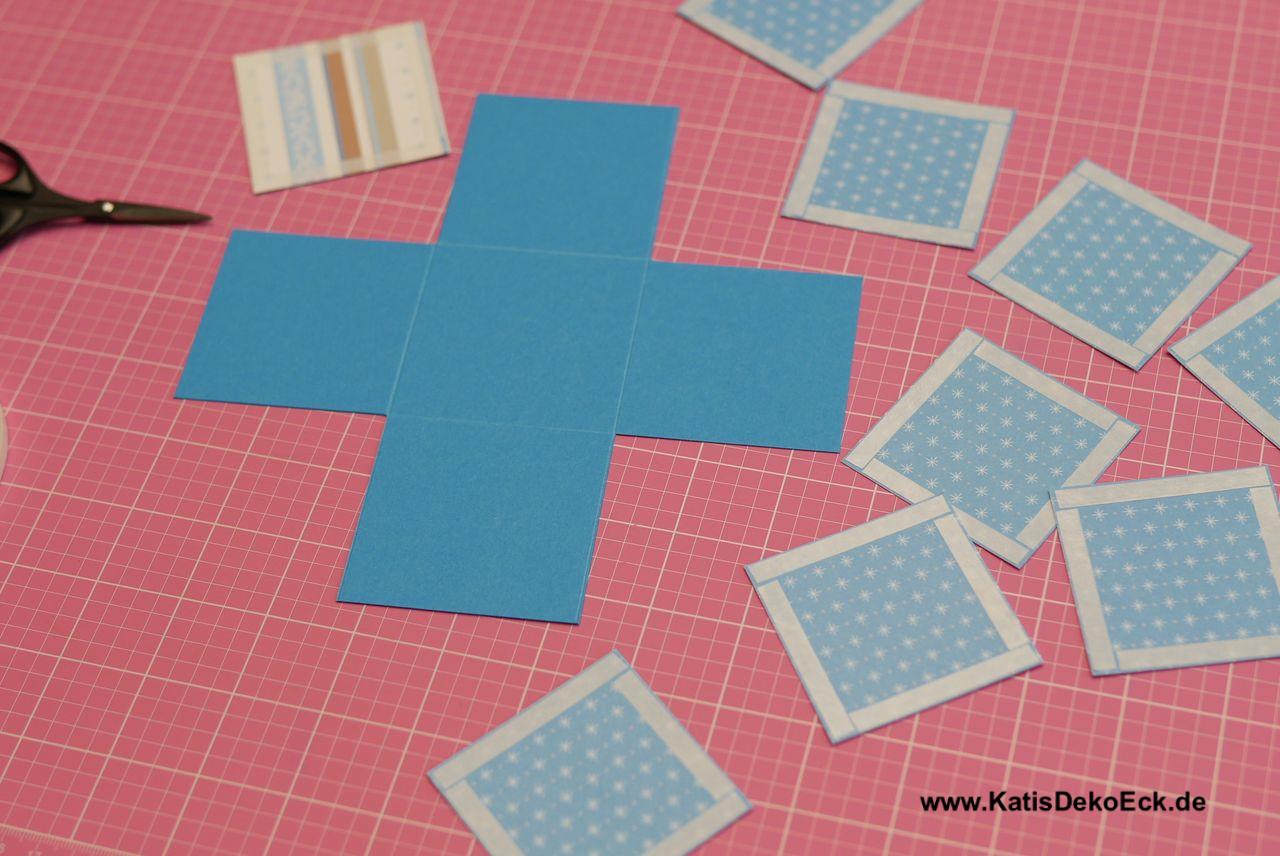
By that my basic papers are ready. But as already mentioned I also want to decorate the sides of my box and so I will cut these papers right now to be done with it:
Ok, the cutting job is done and the machine can be put away as now it is time for
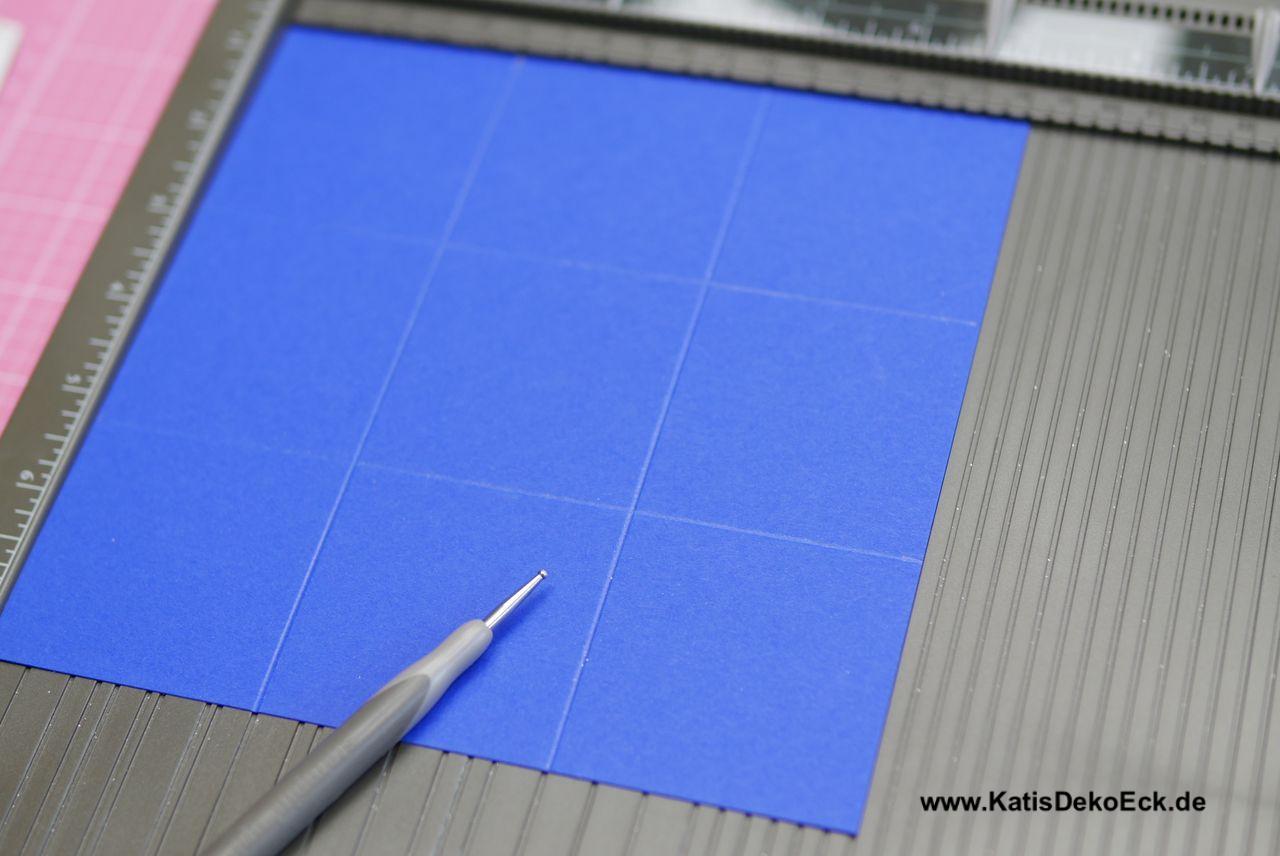
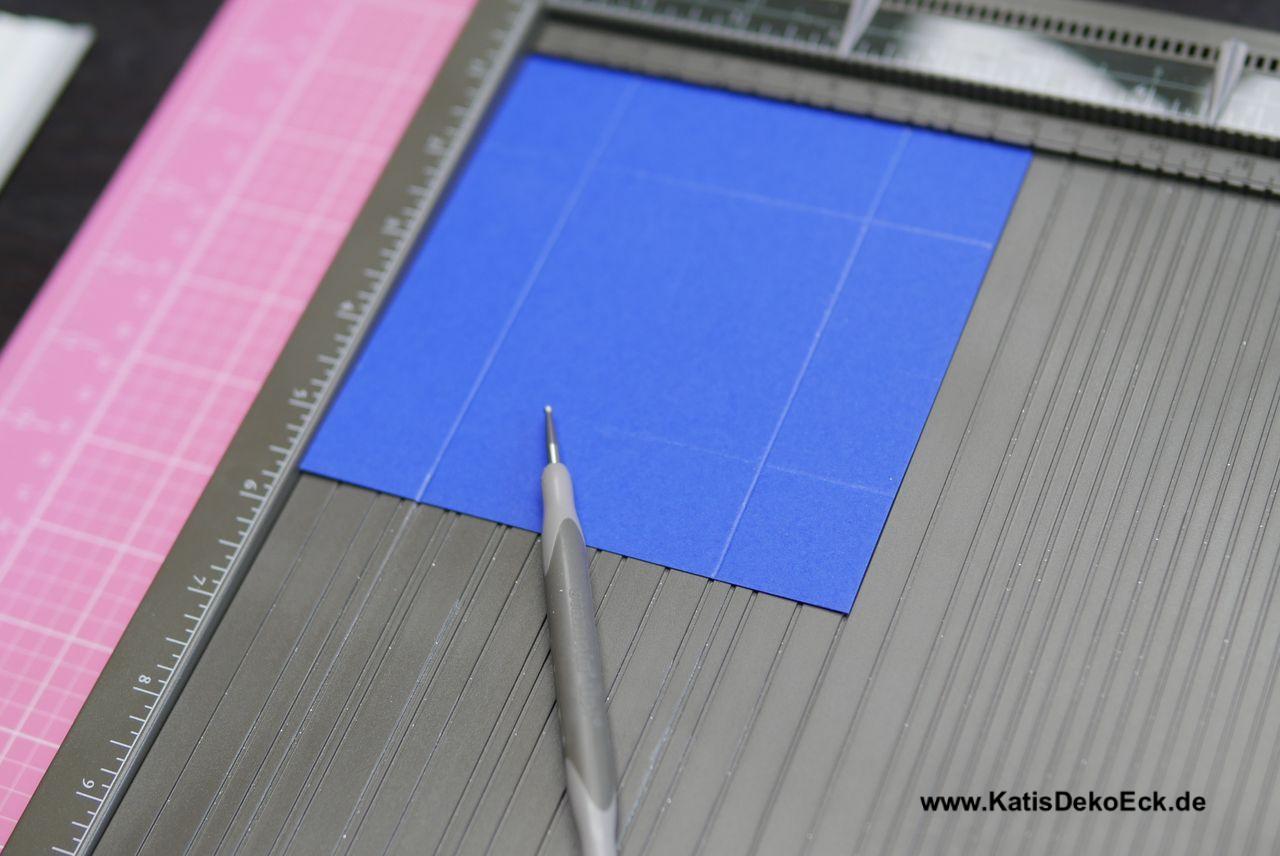
The Scoring
This task will be much much easier if you got a scoring board at hand:
At this point I usually finish one part of the box after the other. So, let’s start with
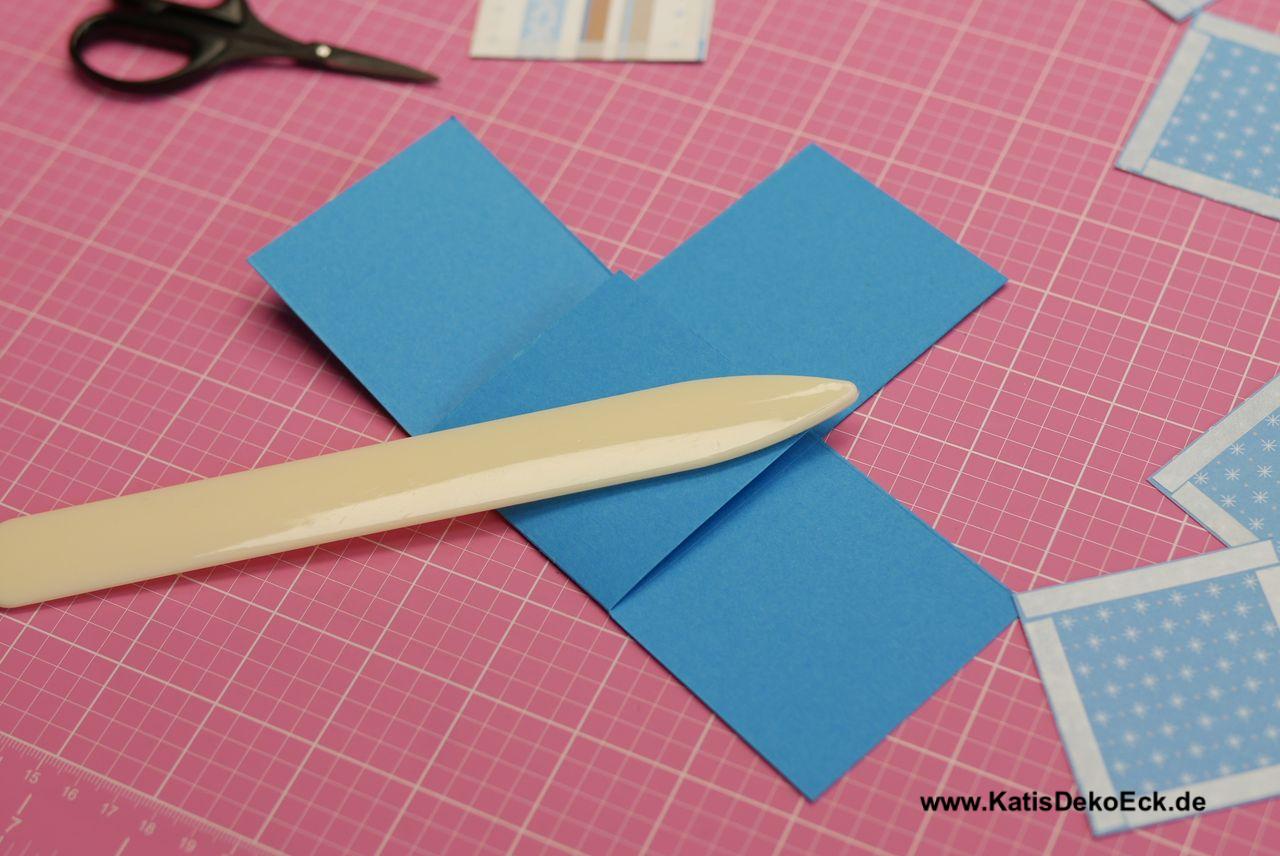
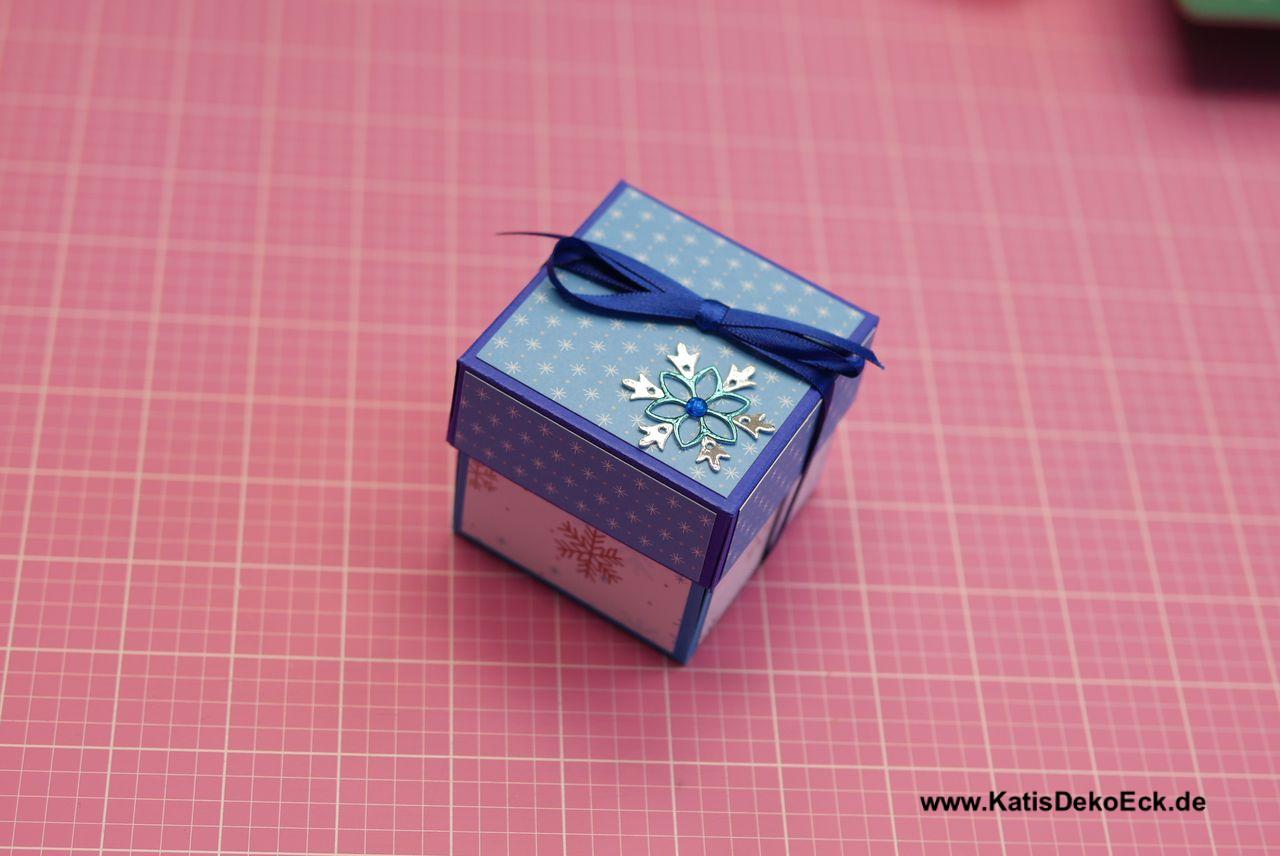
The lid
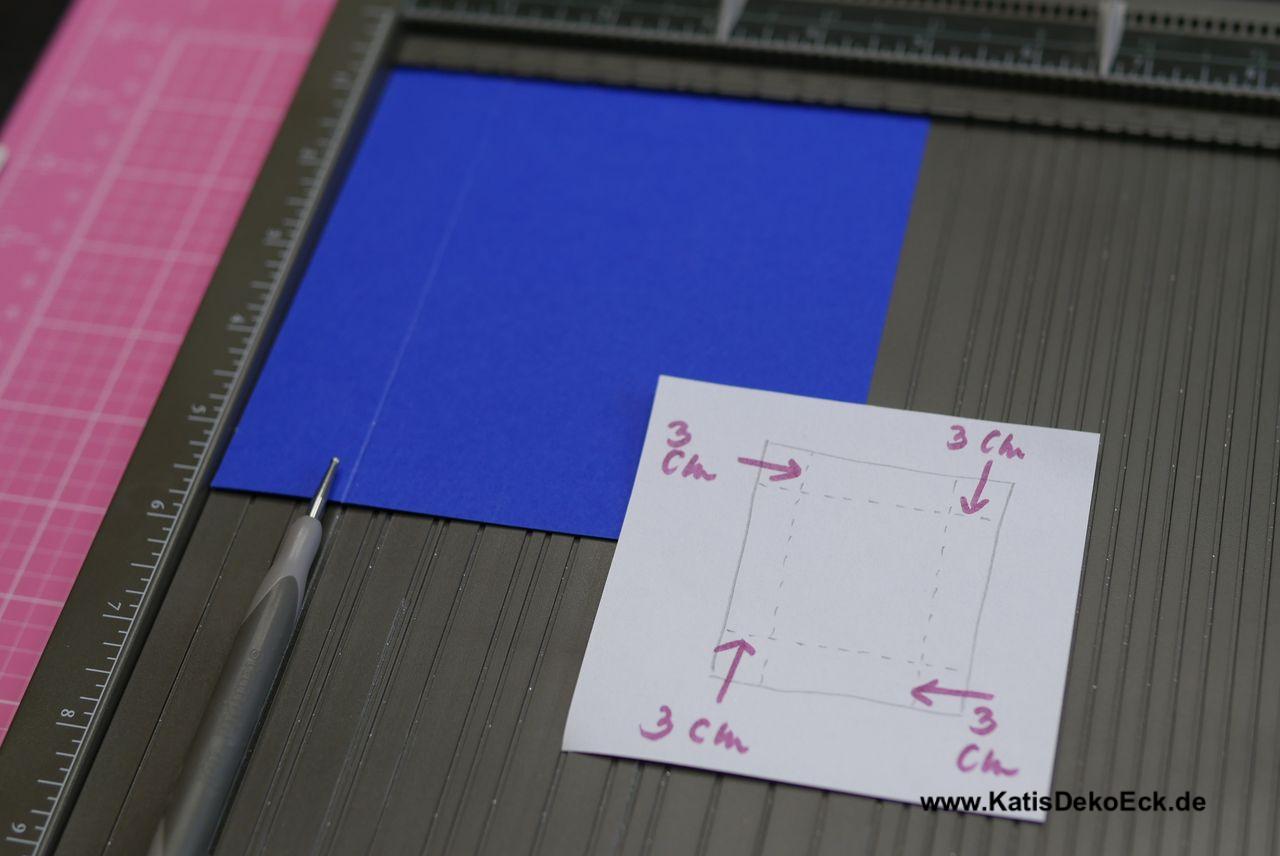
That’s very easy. Simply score each side of the square paper at 3 cm, cut the edges as shown on the picture, put adhesives (in my case doublesided tape) on the corner pieces and glue them together.

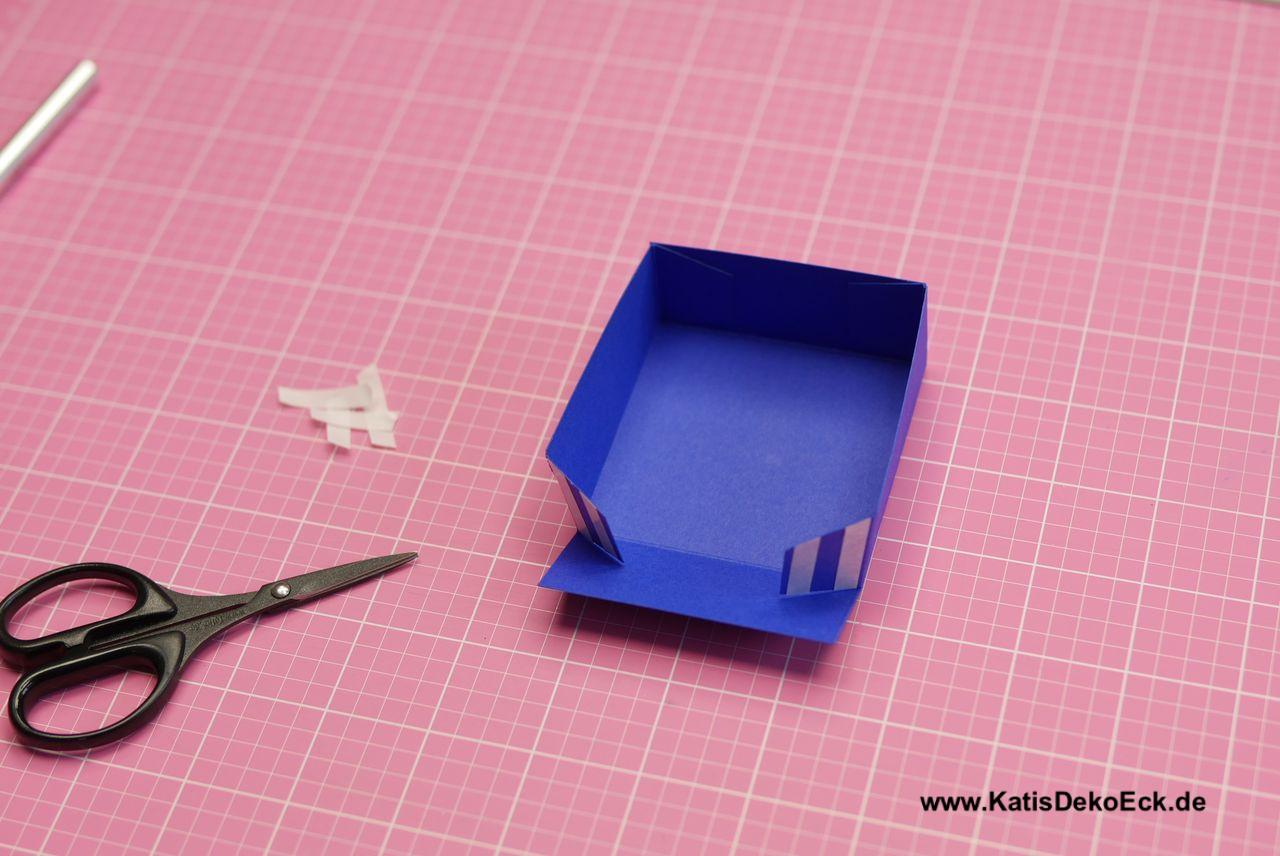
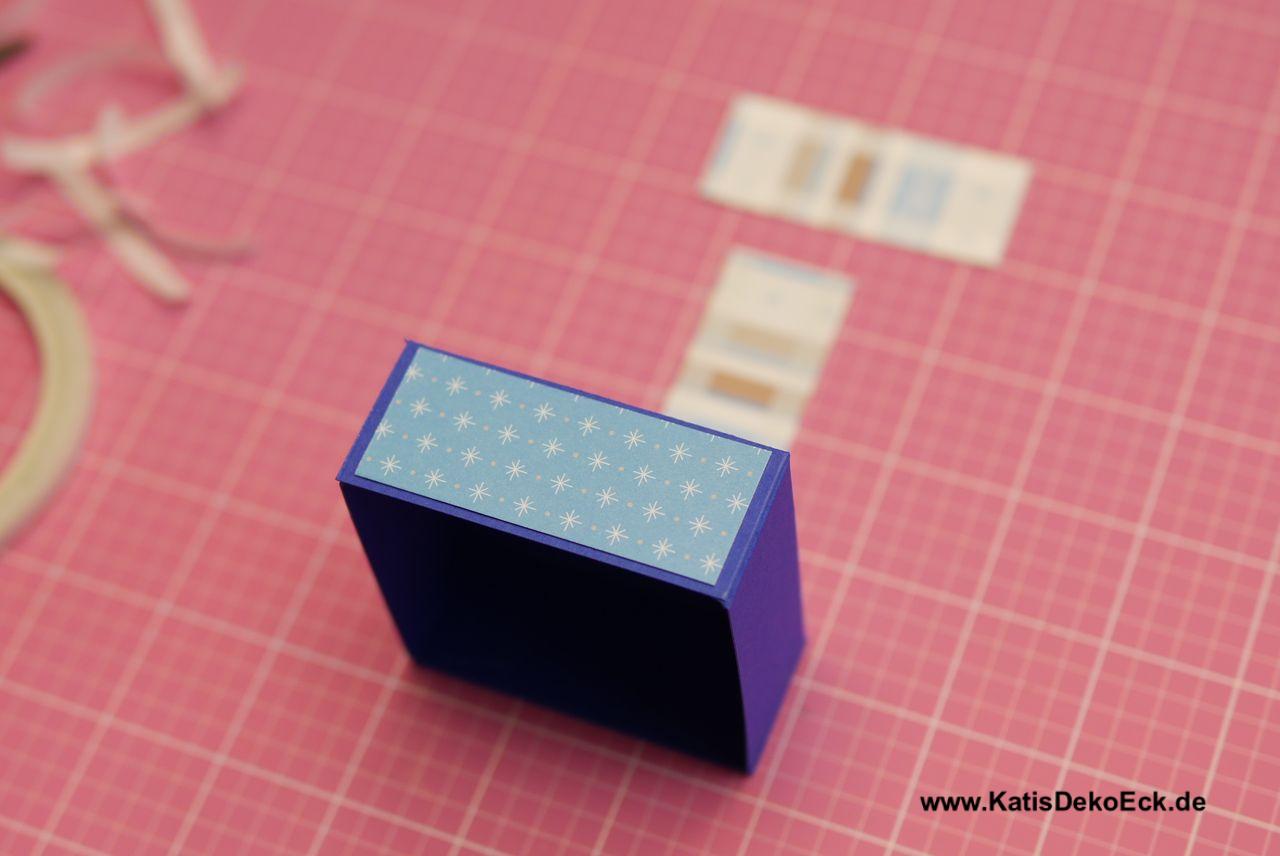
The lid will then be decorated with the separate 6.5 x 6.5 cm piece of paper and with the small side pieces and it is ready to go.
So now it is time for the second part of my box:
The outer layer
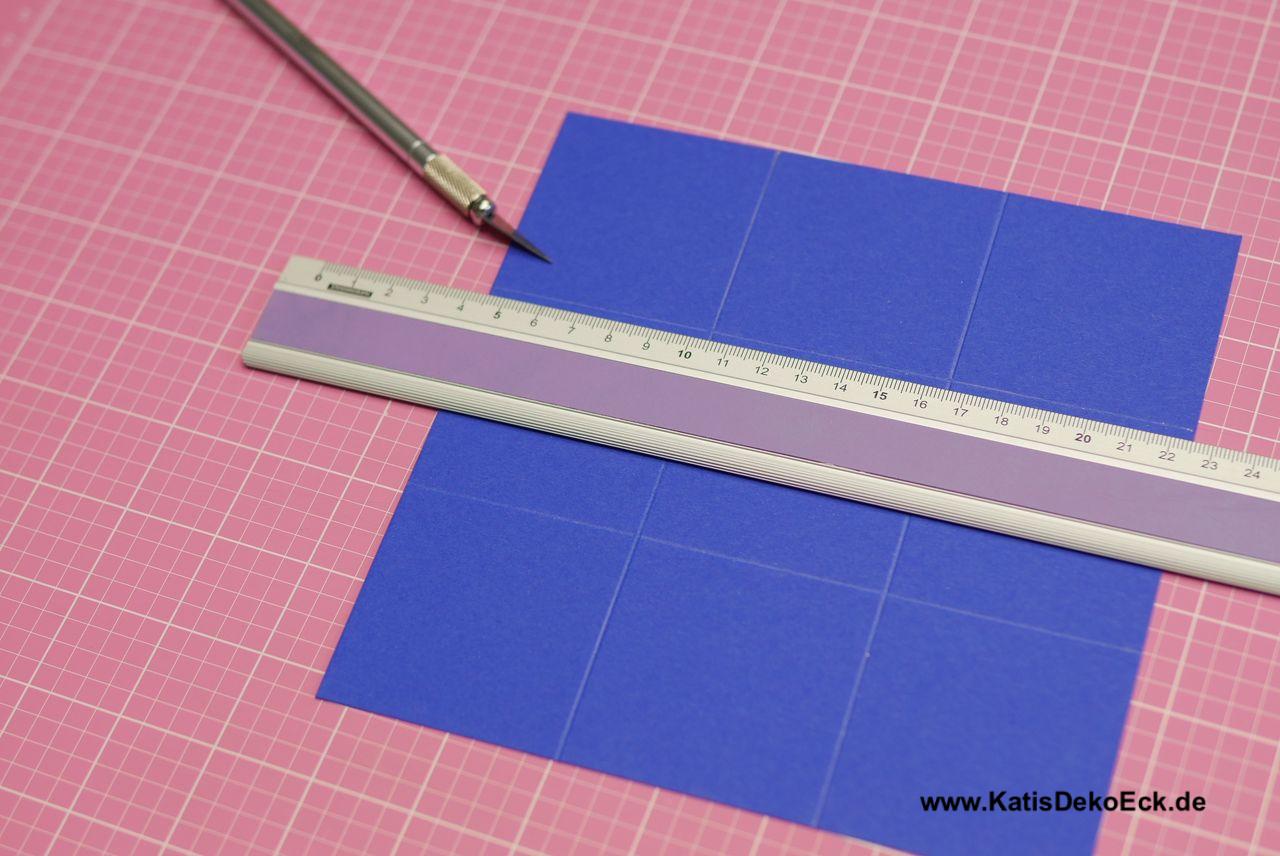
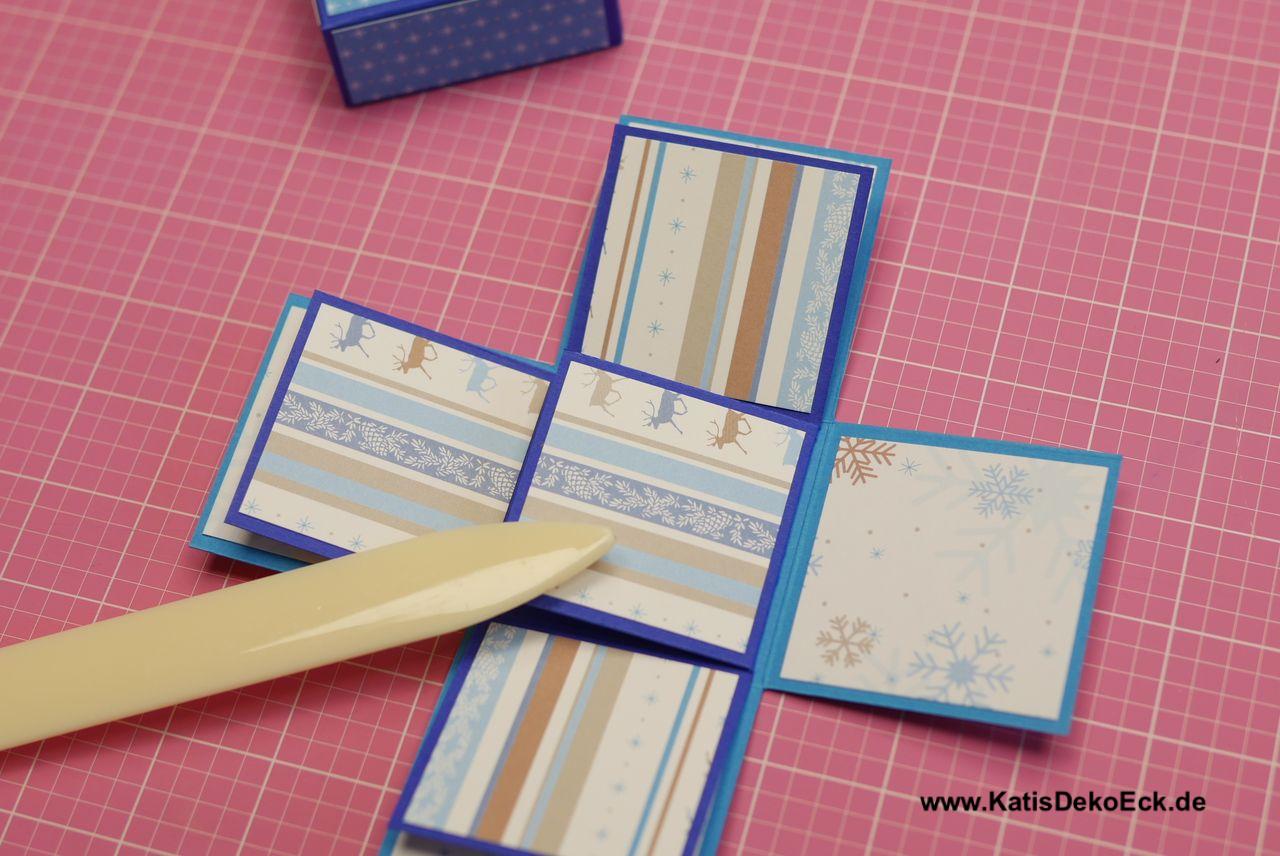
For this one I take the biggest of my square pieces and score it: this time at 6.5 cm on each side:
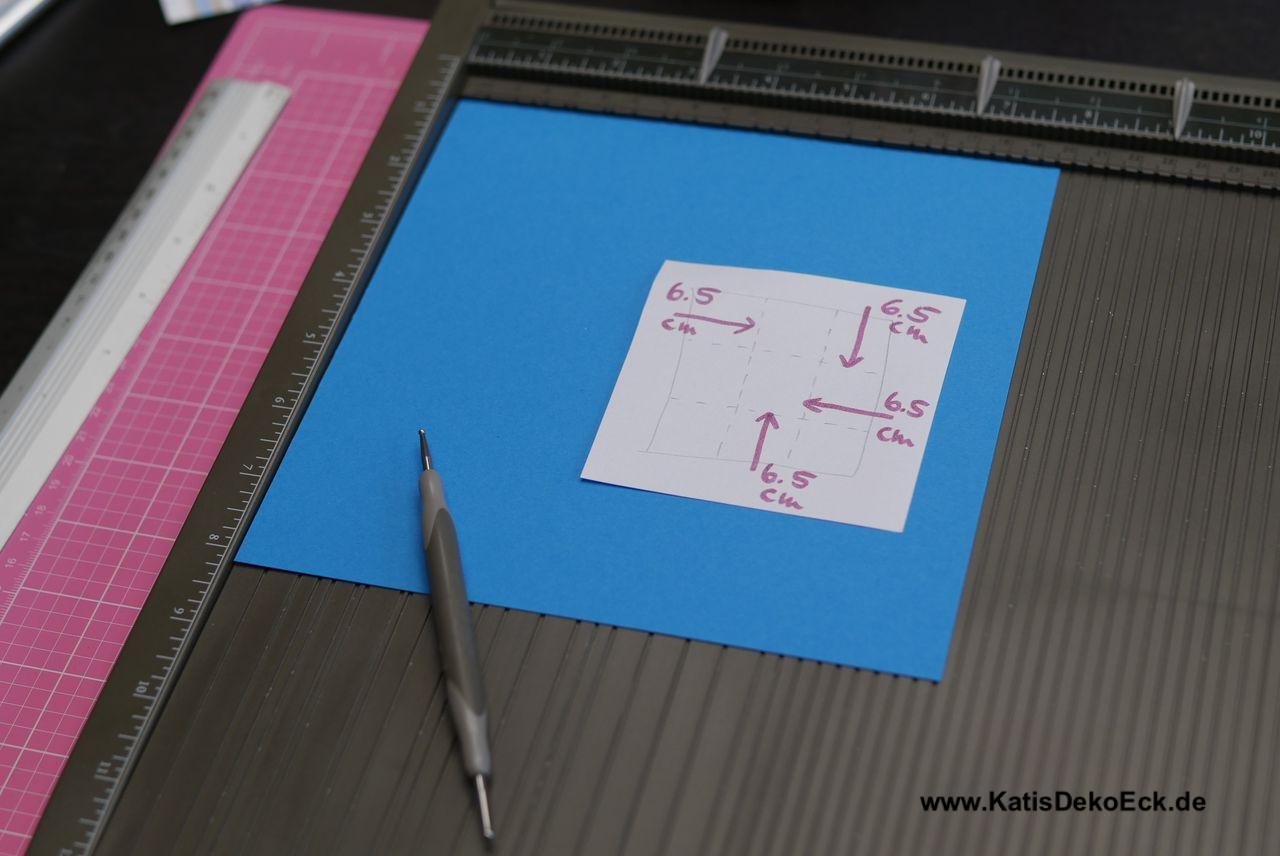
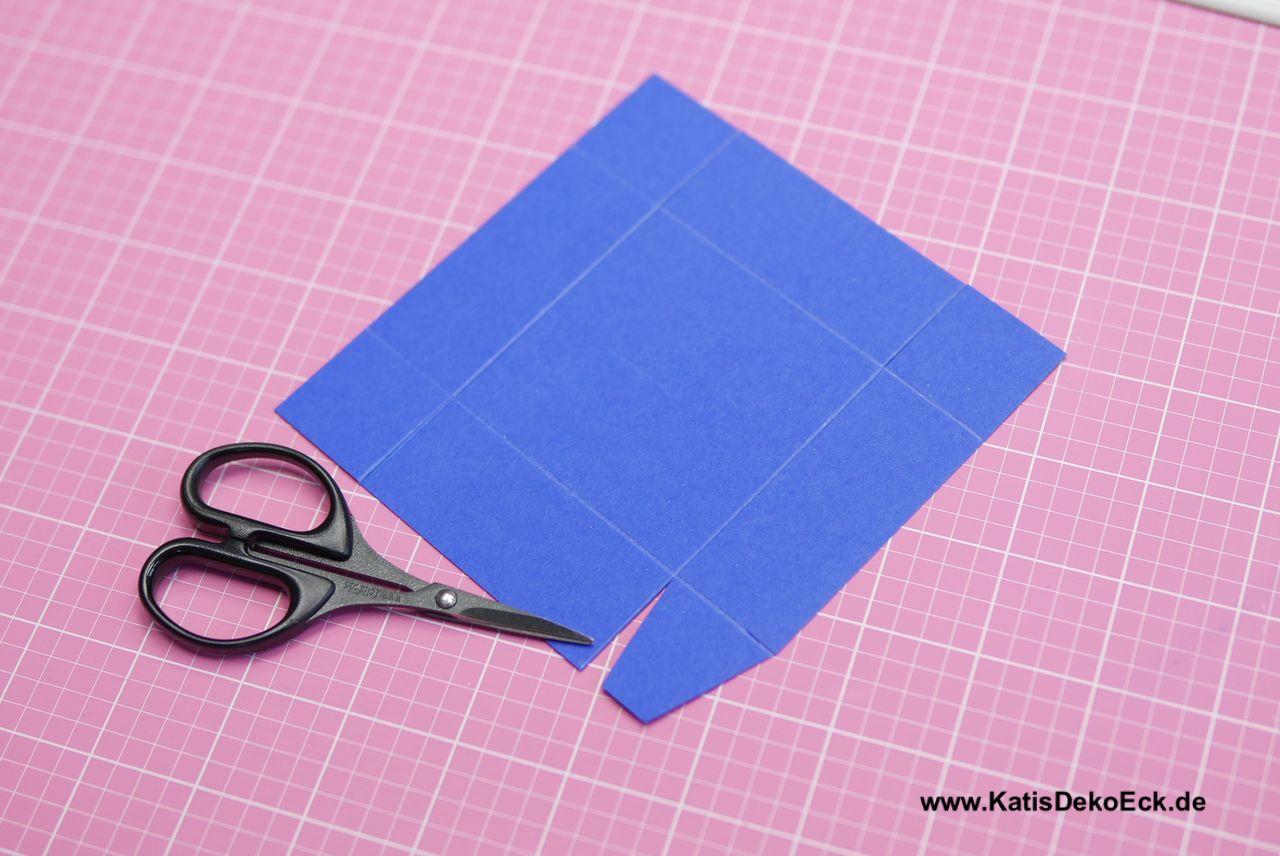
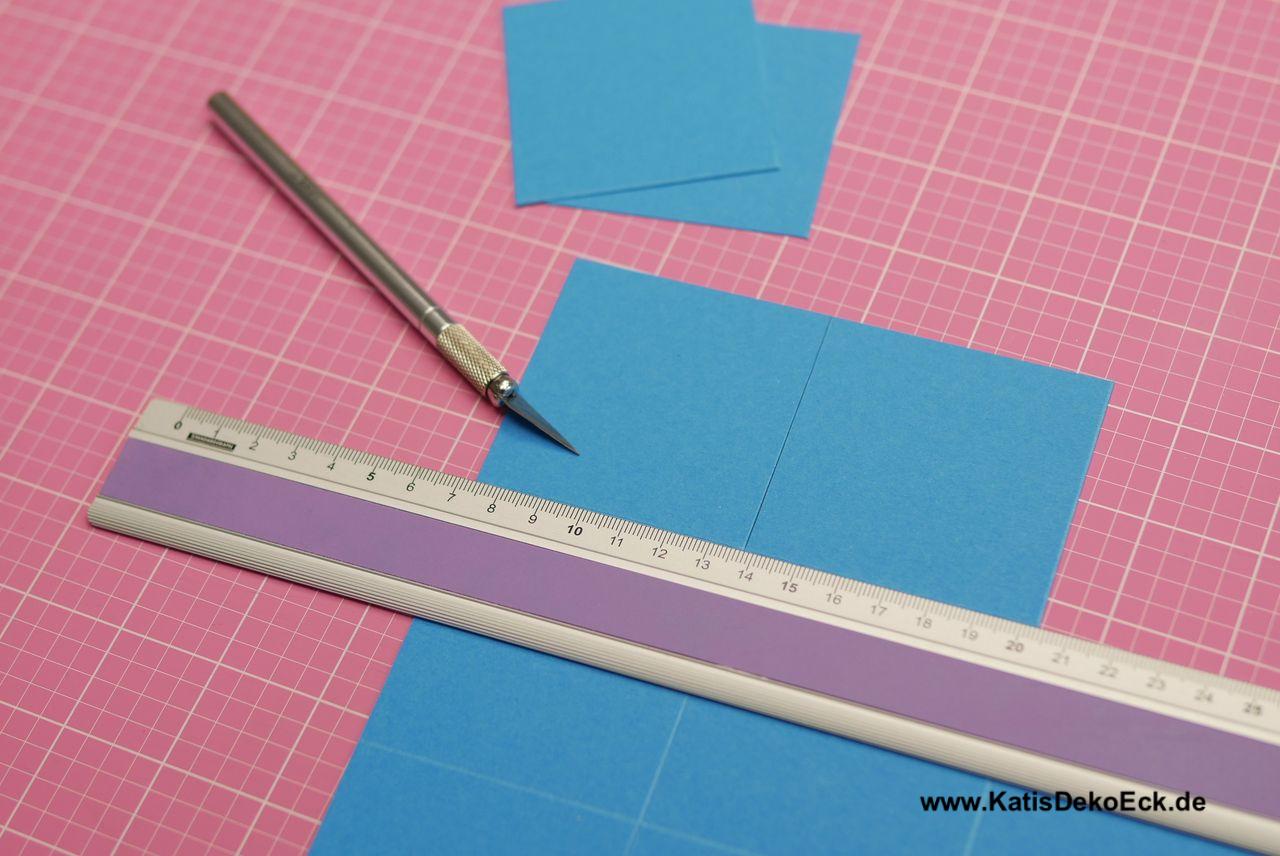
And here we get to the mysterious part: by scoring this way you get nine squares on the paper. Now cut away the four outer ones. You can easily do that with scissors, but I prefer to use a craft knife and a steal ruler because that brings a more cleaner and straighter cut and perfect edges:
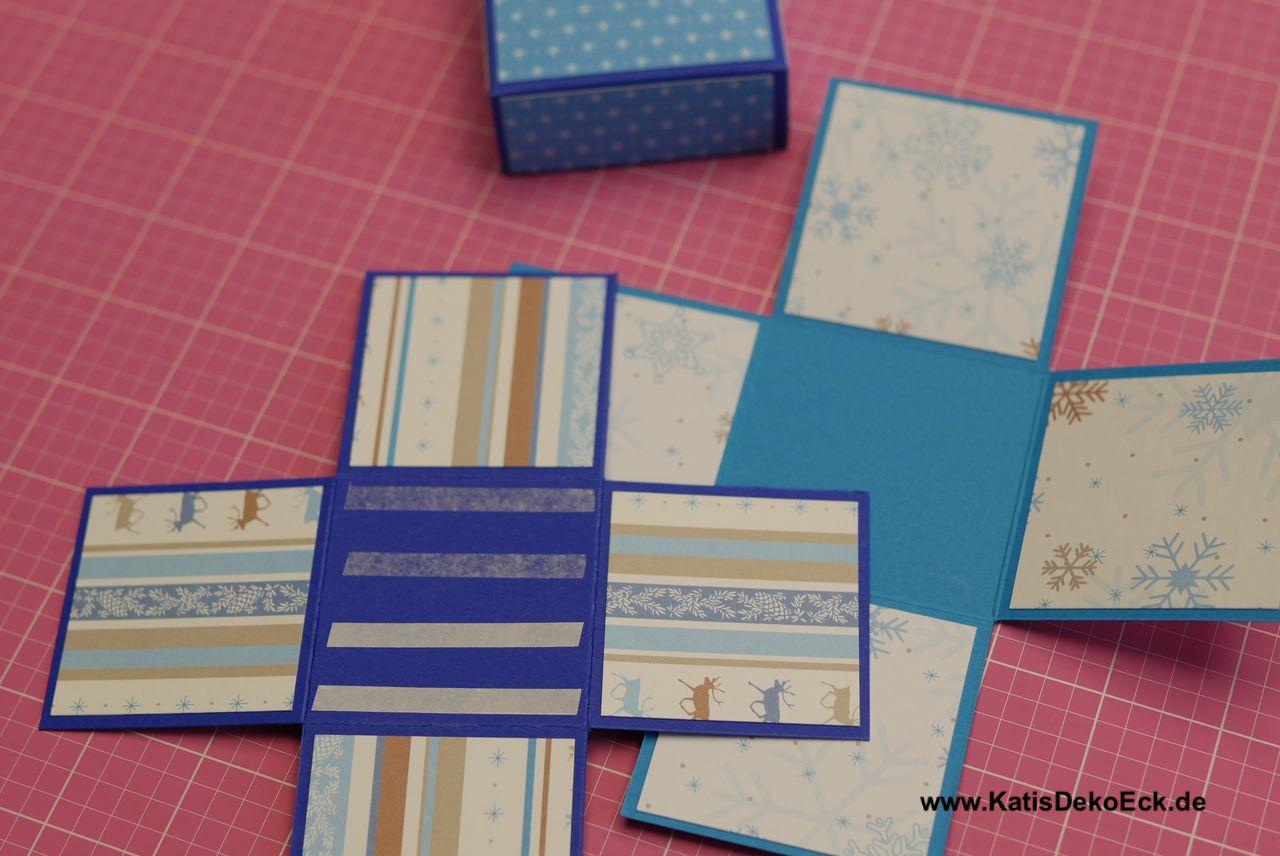
Now it is time to also decorate this layer. For the (outer) bottom of this box I use the one piece of 6.3 x 6.3 cm paper. Be sure to very carefully score the edges, because these will be the outer sides of the explosionbox:

And now we reach step three:
The inner layer
Now I take the middle sized square, score it at 6cm off each edge and cut it similar to the previous one:


Only this time I do not decorate the bottom side but put a lot of adhesive on it. This one will be glued together with the inner side of the outer layer to combine these two pieces:
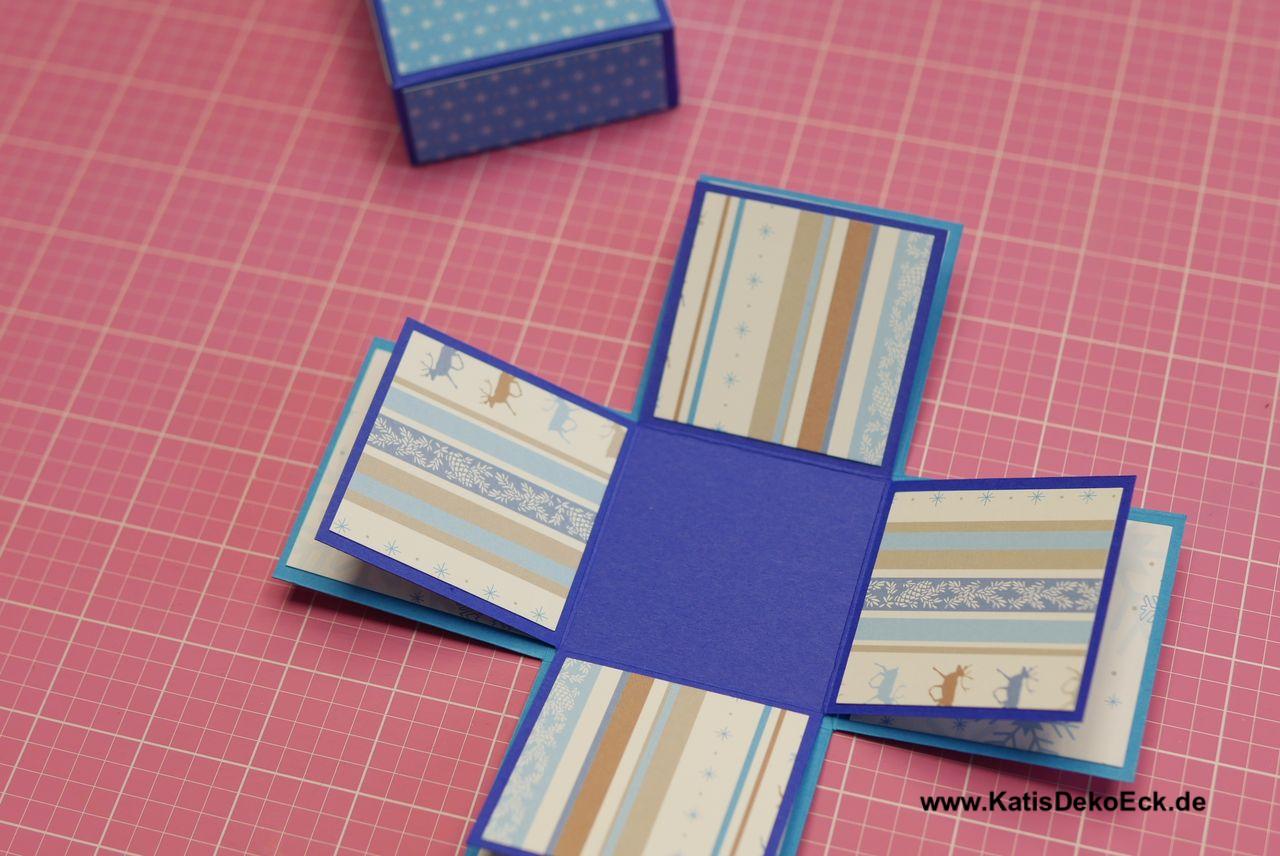
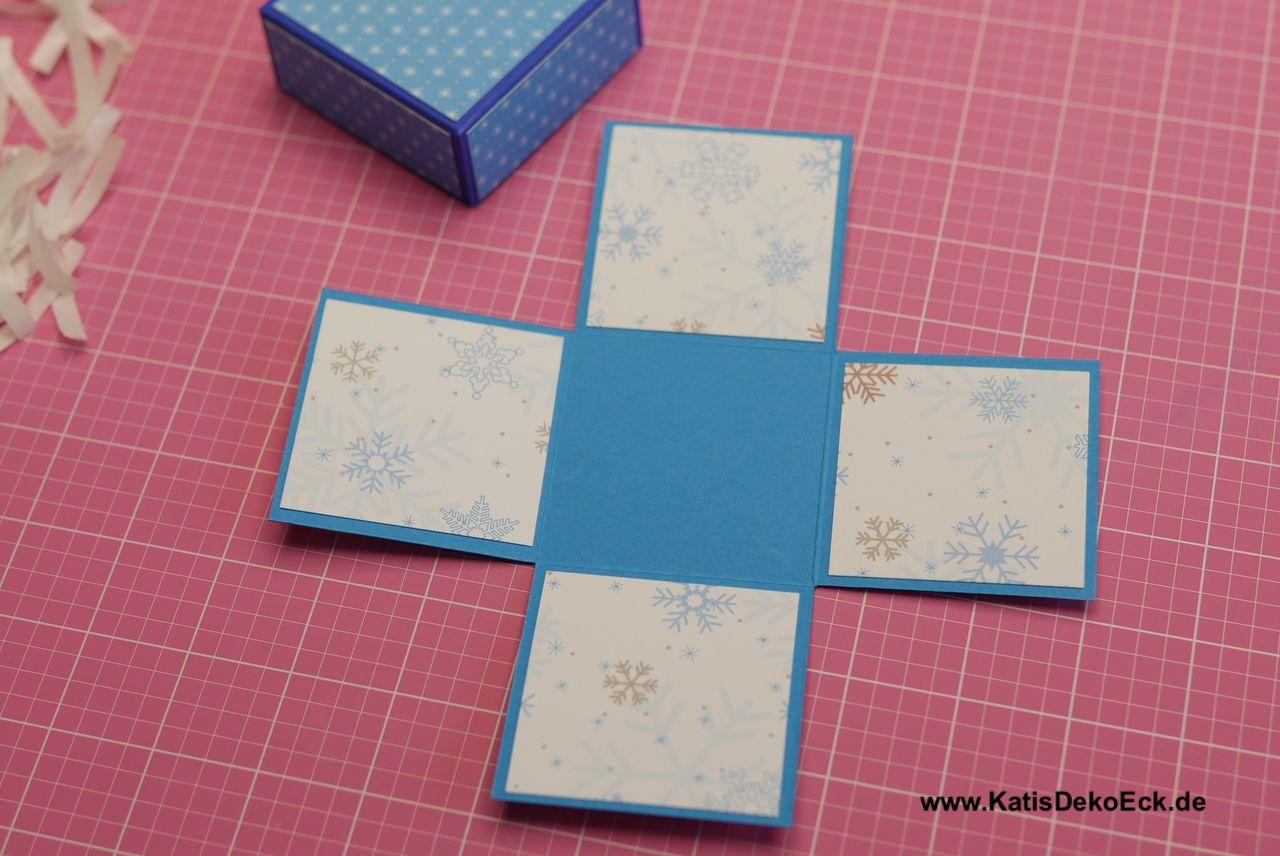
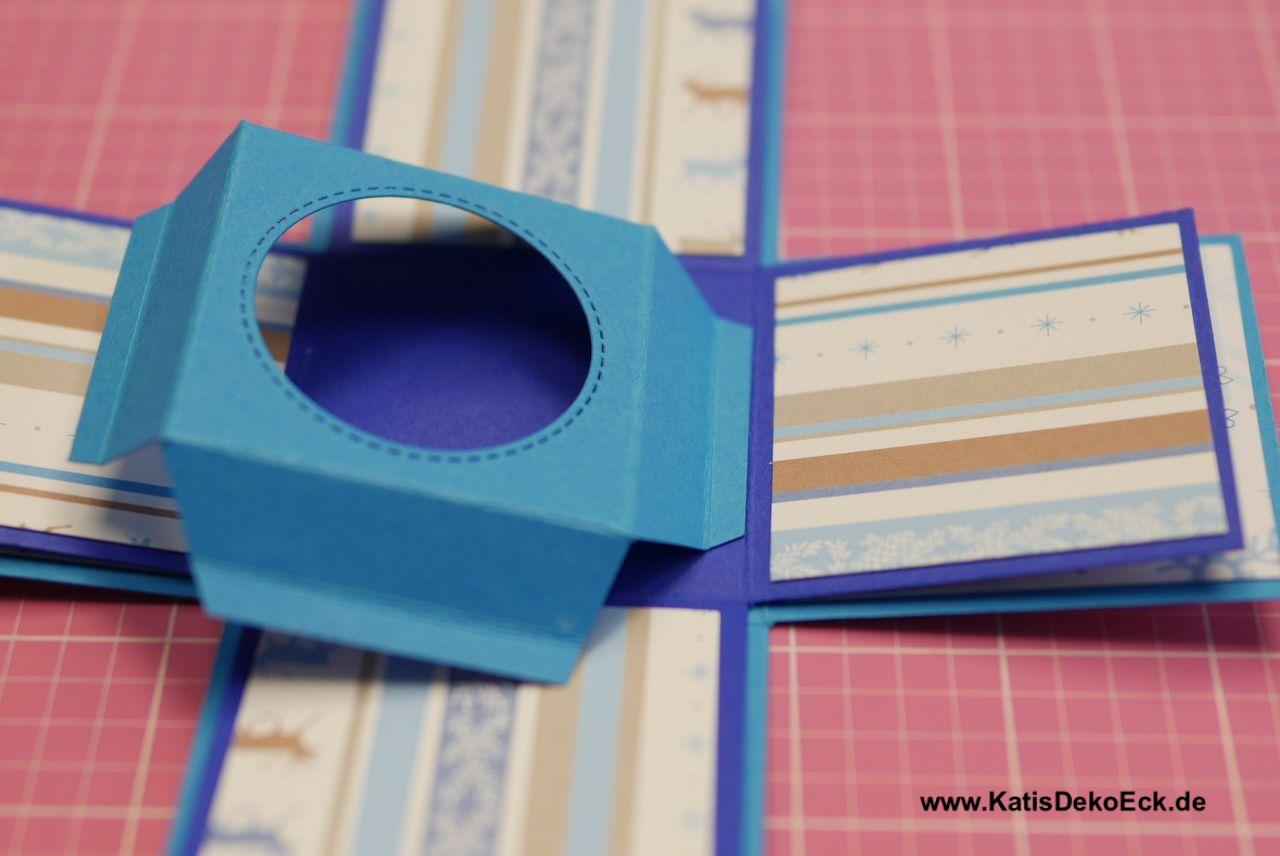
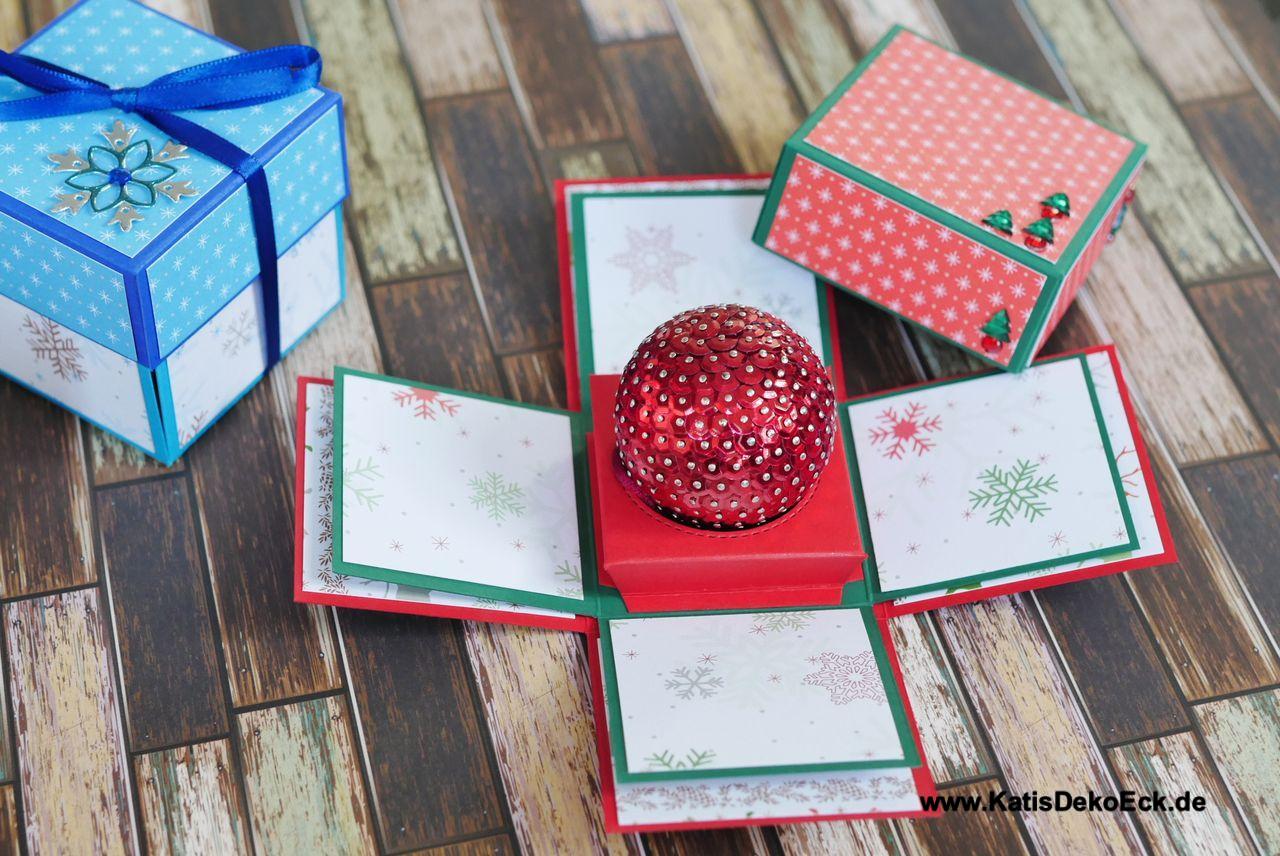
Here we got: the explosionbox is basically finished.
But I want to fix my christmas bauble nicely to avoid it rolling around when the box is opened. So I build a pedestal. And thats what the last remaining square is for:
The pedestal
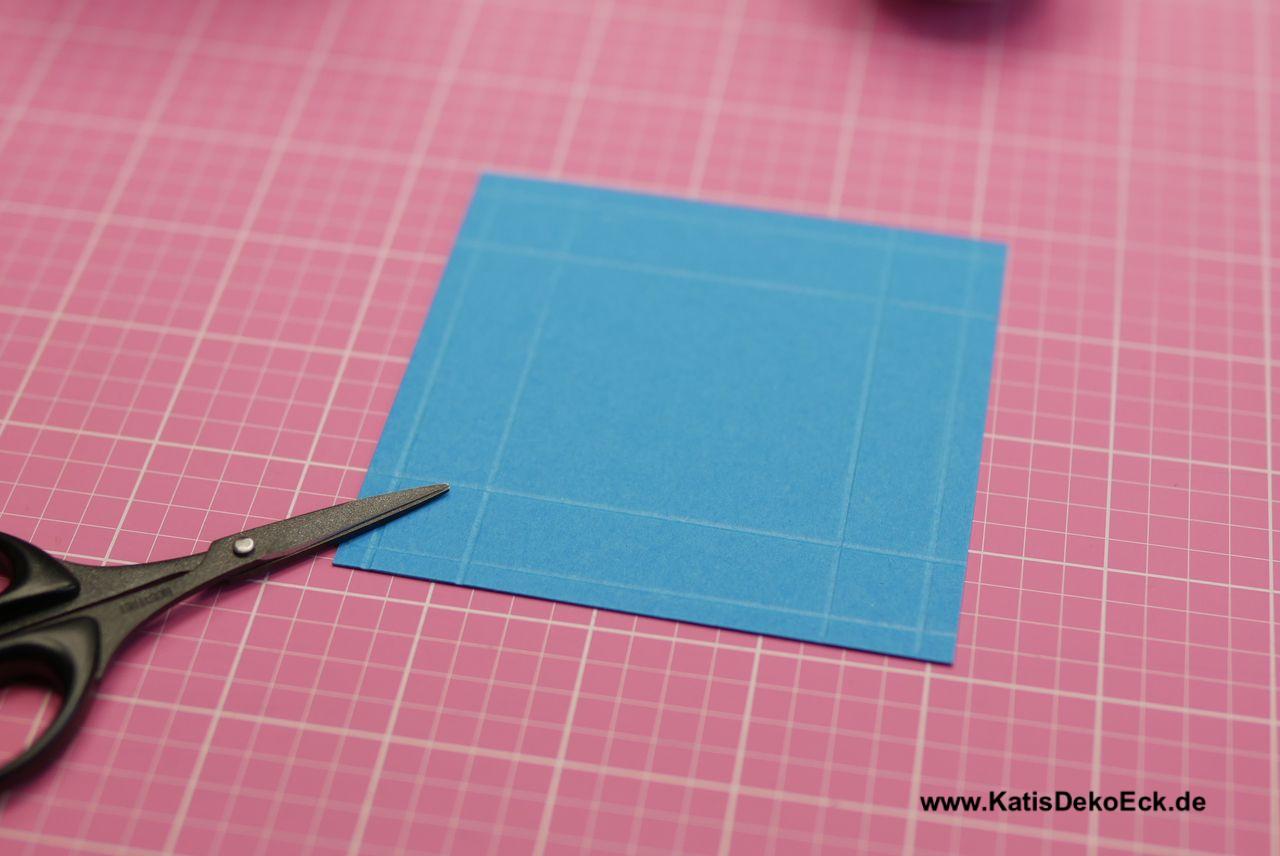

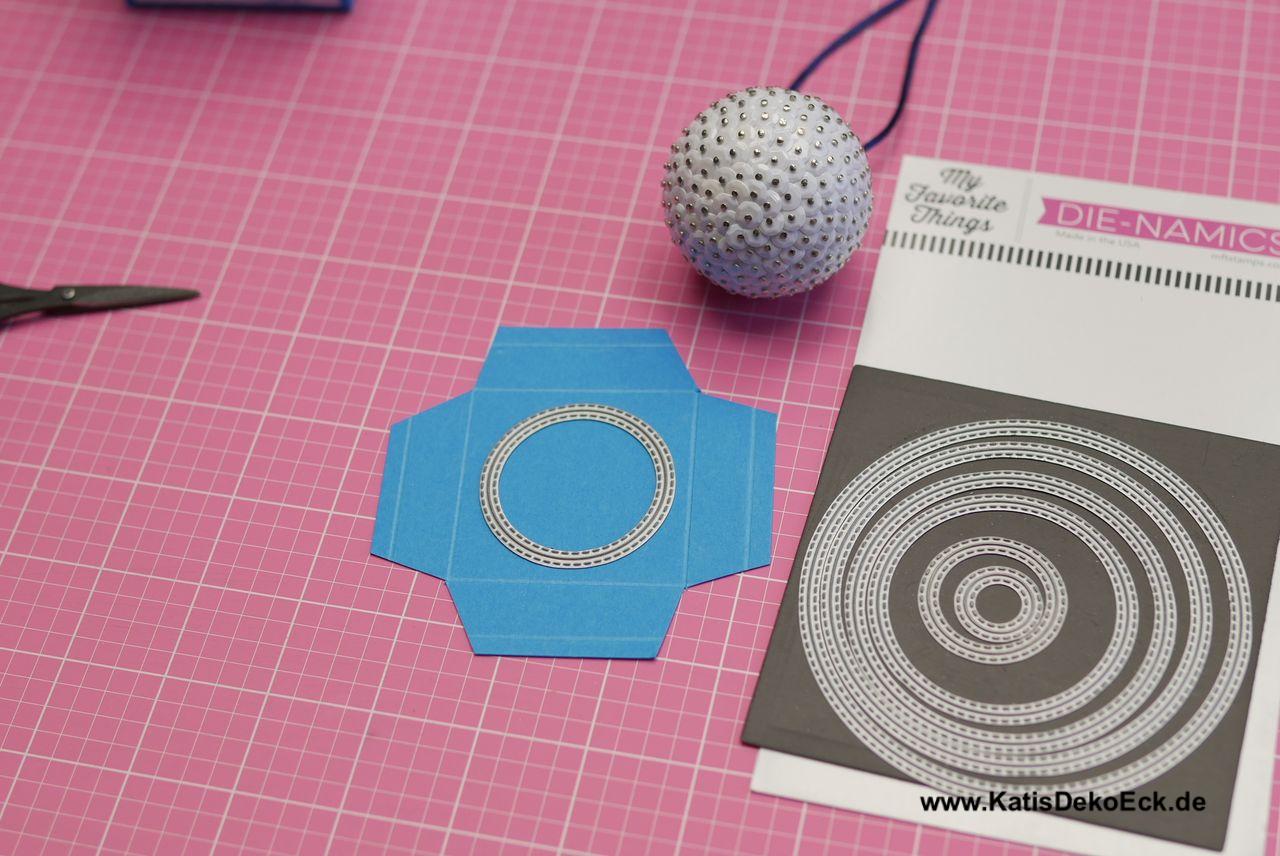
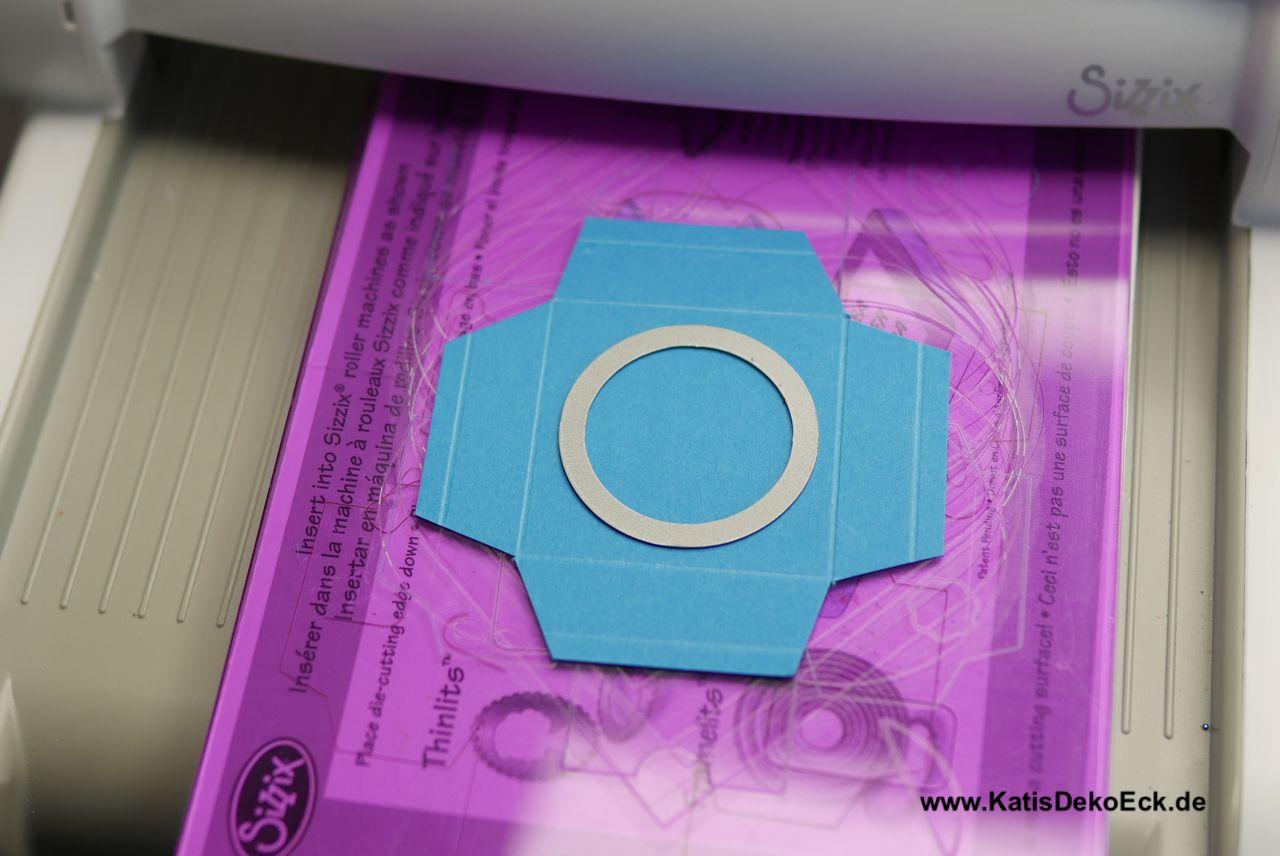

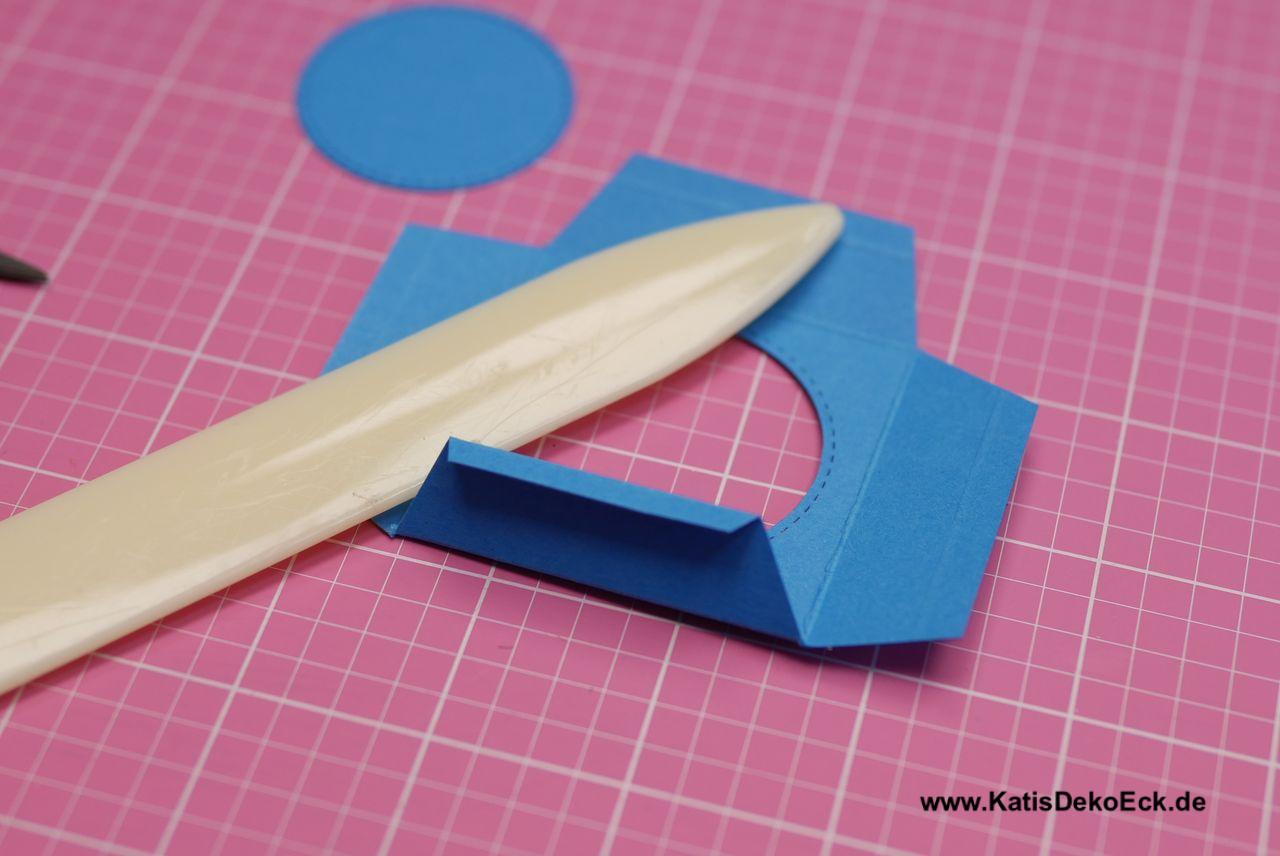
Easily done, now only adhere the sides in my explosionbox and it is ready to host my christmas ornament:

I’d say this result was worth the efforts: 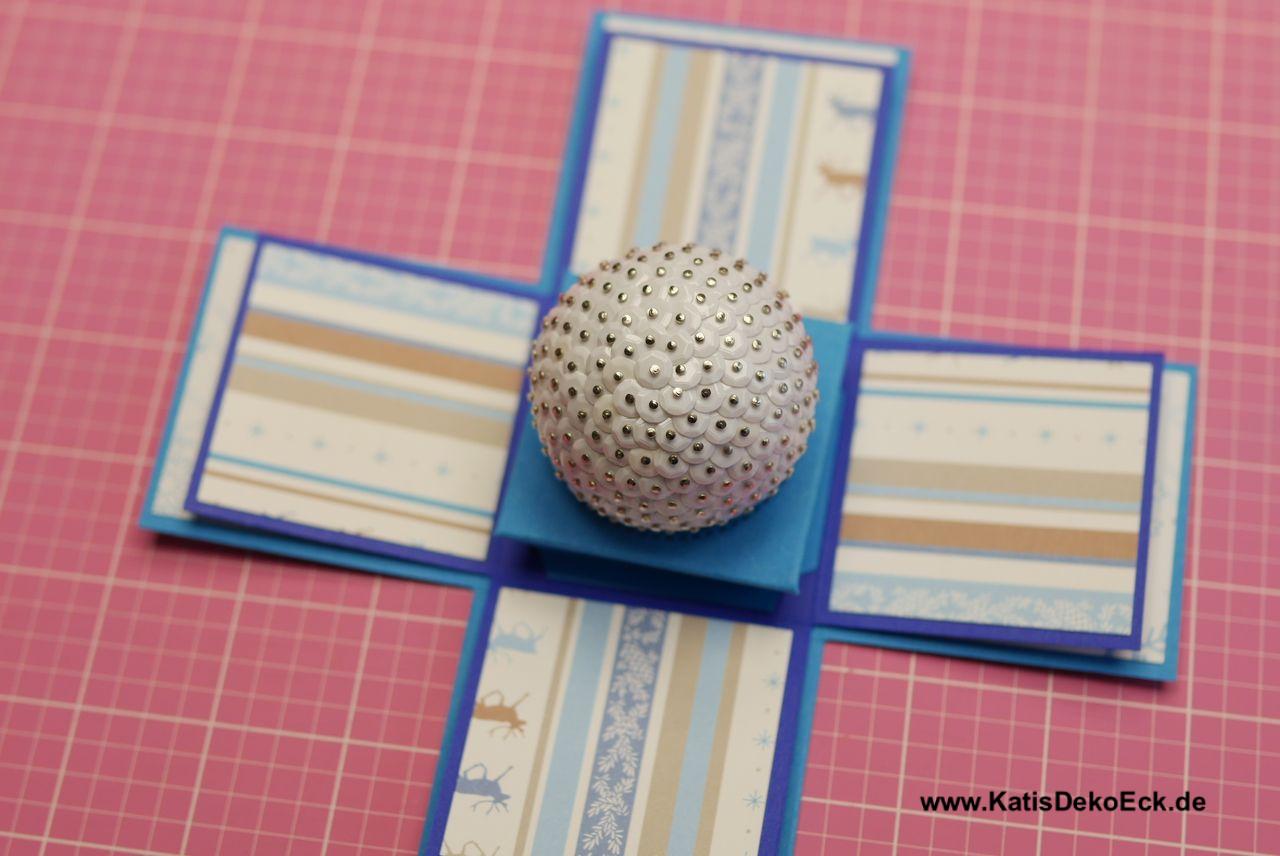
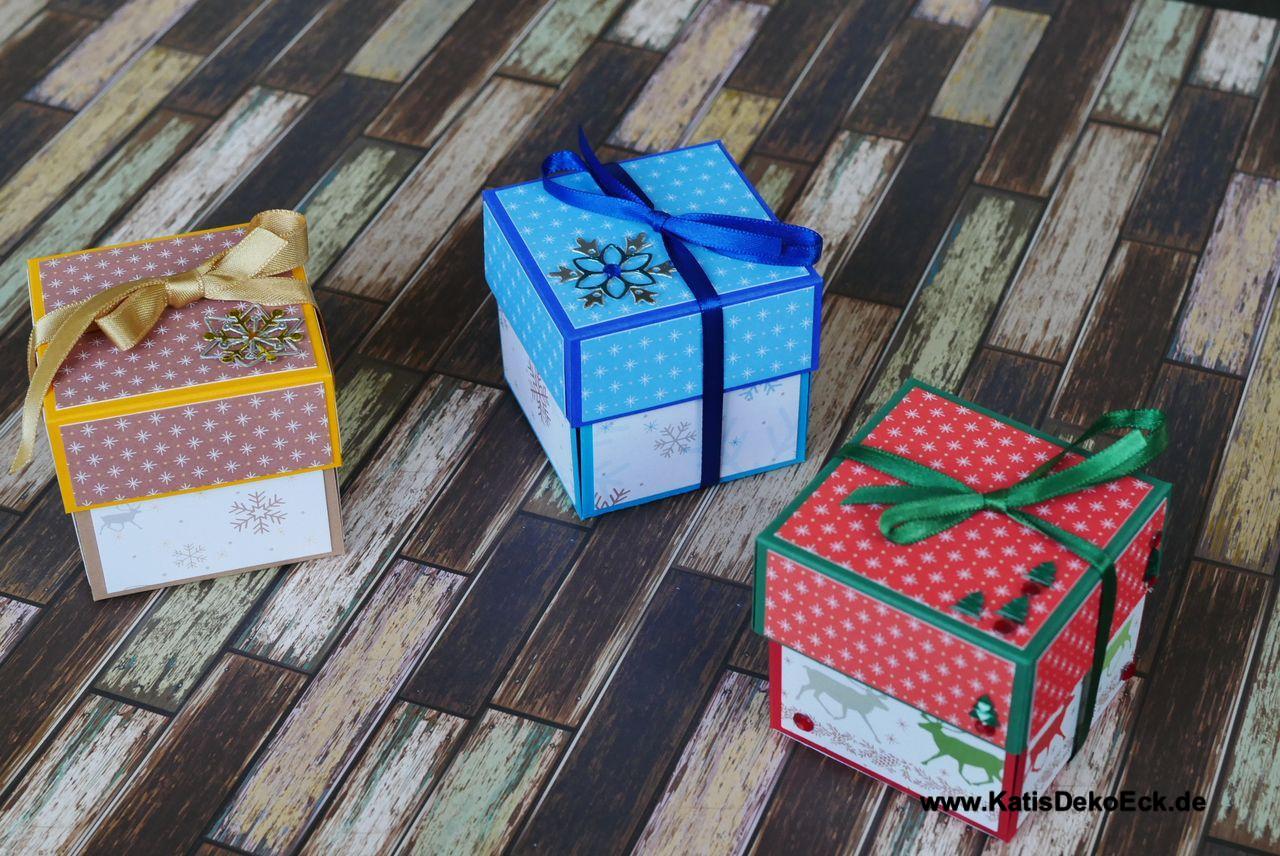
My box is finished, and there is left to do is decorating the outer side of my box to make it ready to be presented to someone special:
As already hinted earlier, I could not stop at one box. Currently it is these three, but more are in the making.
Do you like these? Well, try to make such a box yourself, take a picture and share it on Instagram using hashtag #KatisDekoEck, because I would love to have a look.
Oh, and in case you do not want to do all this work, but want to gift a box like this to someone, just contact me. You can find these boxes as well as many other gift box ideas for Christmas in my Etsy shop.
So, what’s next?
Of course now it is all about preparation for the christmas market stall. And with a lot of creative ideas, so stay tuned for more!
Deine Gedanken zu diesem Thema